Introduction to the Entity Editor
From Shoot Em Up Kit
The Entity Editor is used to specify how an object behaves in your game. You can set which model or sprite will be used. You can set the collision shape and size. Tags (Markers) can be added to the sprite or model to specify where the guns or thrusters are. And you can specify whether the object will use a physics simulation.
Once you have set up your object then it will be ready to be placed in the levels. You could place the same object many times in a level (for example, placing many rocks or floor tiles). Each item you place in the Level Editor will be an instance of the Entity Editor object (i.e. it will reference back to the Entity Editor object). This allows you to go back and tweak an object in the Entity Editor and all the instances (the items you placed using that Object) will be updated.
The Entity Editor is also where you would turn your own 3d models into objects that are ready to be used in your own games.
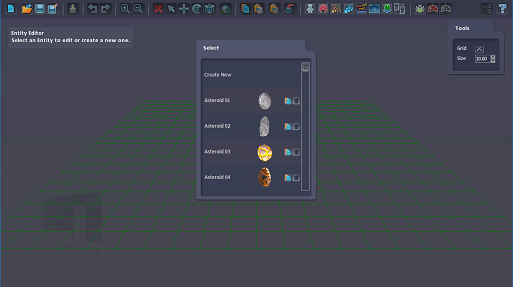
You start by either selecting an existing Entity to modify; copying or deleting an existing Entity; or creating a new Entity.
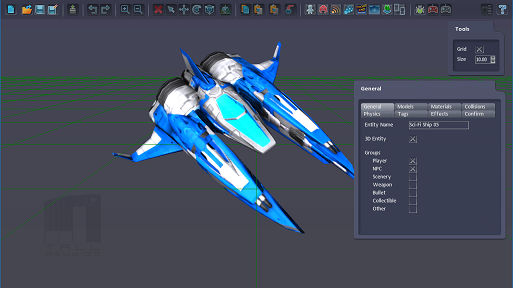
The General tab allows you to set the name of the Entity; whether it’s a 3D model or a 2D sprite; and the groups it belongs to. The groups can be used for filtering out Entities, but Entities are not limited to the groups.
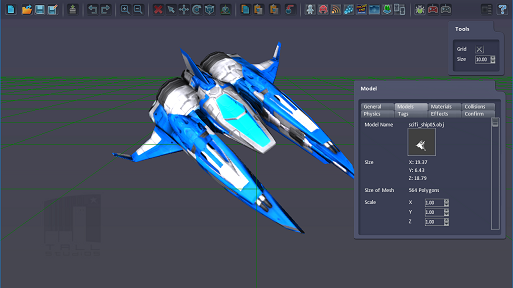
The Models and Materials tabs are only shown if you have selected to use a 3D model in the General pane.
You can swap in different models and set the scale (the size) of the model. The grid size can be used to help gauge the size of the object.
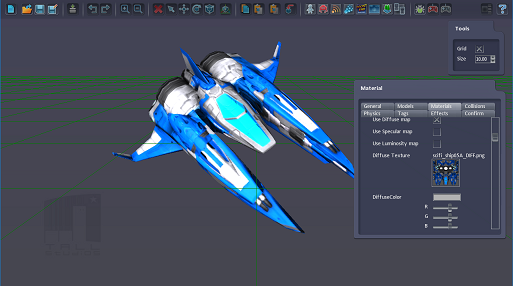
The Materials tab can be used to change the shader that is used to render the object. The default shader is good for most games and allows you to customise the textures for the object, including the diffuse texture (for the colour); the normal map (sometimes known as a bump map); specular map (for shiny, polished items); and luminosity map (for items that glow).
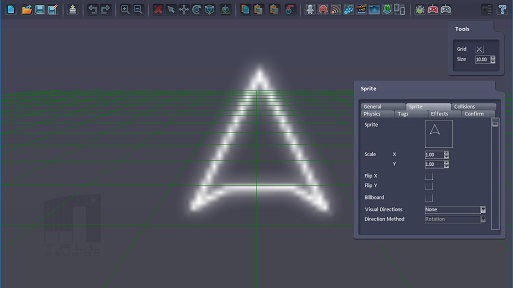
If you are creating or modifying a sprite entity then you will have a Sprite tab. This allows you to select the sprite; it’s size; and whether it is a billboard sprite (always facing the camera).
If you would like different sprites to be shown when the object is moving in different directions (walking left and right, for example) then you can select the number of visual directions and assign sprites to each direction.
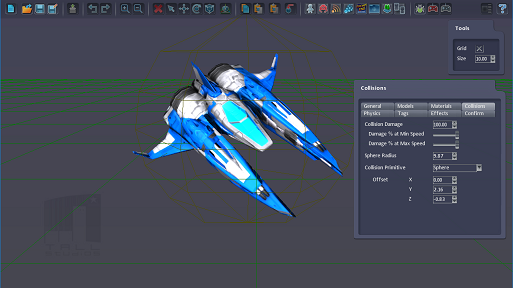
The Collision tab is used to set the size of the collision sphere, which is a sphere that surrounds the area of the model where collisions will occur.
You can also set a collision primitive, which can be a box, capsule or convex model which can be sized to fit the shape of the model’s collision area more closely. The collision primitive is option but if it is used then collision will occur only when another object collides with the sphere radius and the collision primitive.
It is also possible to scale the amount of damage based on the speed of the object.
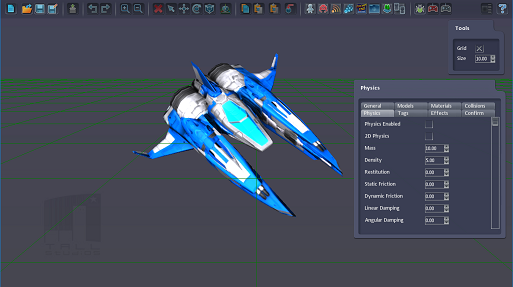
The Physics tab can be used to specify whether the entity will use a physics simulation. If so, properties such as Mass and Friction can be specified.
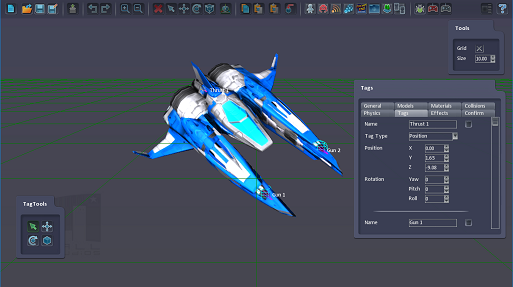
Tags are a useful way to mark position on the model or sprite where the guns will fire bullets from; the thrusters will apply force; or where another object could attach to, for example.
Tags can be applied to a position on or around the sprite or model. And for 3D models they can be attached to a specific face or vertex, allowing them to remain in-place even when the model is animating.
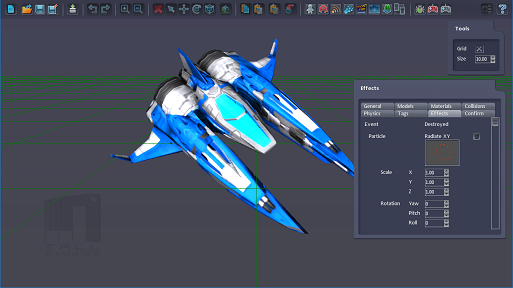
The Effects tab enables you to specify particle effects; sound effects; animations; and other effects (such as camera shake or slowing down time) that will occur when different events occur.
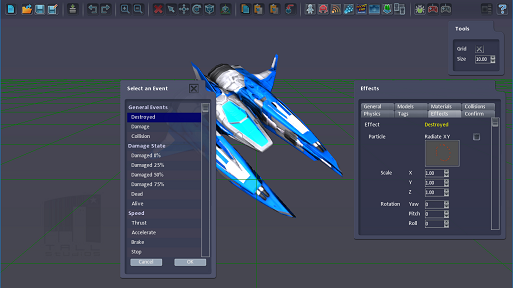
To modify a different event, click the Event type (e.g. Destroyed) and select which event you would like to modify from the list which is given. This will update all the properties to show those currently set for your newly selected event.
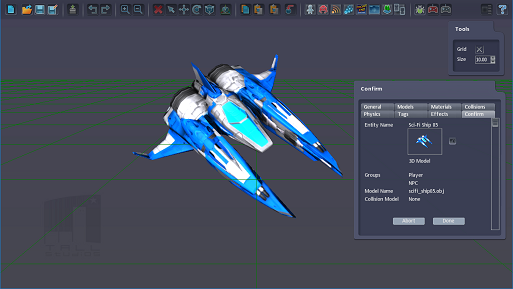
The Confirm tab is where you can apply all your changes to the Entity. If the Done button is greyed out, please confirm you have set a name for the Entity and selected a sprite or model.
A thumbnail will be created but you can adjust the rotation of the model and click the camera icon to update the thumbnail.