Create a Spline
From Shoot Em Up Kit
Uses of Splines
Splines are curved lines which can be used a mark out a path for cameras, NPCs or become part of the level scenery. It is also possible to create a joined list of straight lines using the Spline tool.
Placing a Spline
To add a Spline to the scene click the spline icon ![]() on the Tools Menu and the cursor will change to a sphere. Move it to the position of the first node of the spline and click to place it. Move to the next position and click to place another node. Repeat until all points are placed then click the Stop Placing button at the top of the Properties window or press the [Esc] key.
on the Tools Menu and the cursor will change to a sphere. Move it to the position of the first node of the spline and click to place it. Move to the next position and click to place another node. Repeat until all points are placed then click the Stop Placing button at the top of the Properties window or press the [Esc] key.
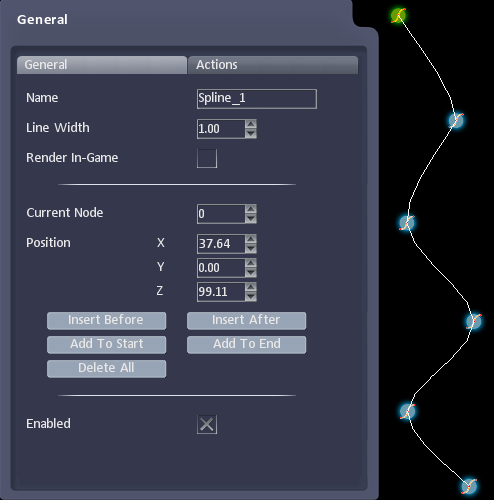
The Spline window will open when a Spline is added or selected. It will have two tabs:
General - sets general object properties such as node positions
Actions - sets up actions for the spline
Spline nodes can be moved by using the Move Gizmo, or by manually editing the position values in the General tab. Clicking on a spline node will make it the current node and the Gizmo and Properties will apply to that node.
General Tab

| Name | Name of the spline. |
| Line Width | Sets how wide the spline will appear. |
| Render In-Game | Sets whether the spline will be rendered (drawn) in-game or only displayed in the editor. |
| Current Node | The number of the currently selected node. This can be changed either by changing the value in the Spin Control or by clicking on the node in the scene. |
| Position | The position of the current spline node. This can be altered by either entering values or using the Move Gizmo. |
| Insert Before | Insert a new node before the current node. |
| Insert After | Insert a new node after the current node. |
| Add To Start | Insert a new node at the start of the spline or line list. |
| Add To End | Insert a new node at the end of the spline or line list. |
| Delete All | Delete all spline nodes except the starting node. |
| Enabled | Whether the spline is active in game |