Side-scrolling camera in the style of Gradius
From Shoot Em Up Kit

Many side-scrolling games, such as Gradius, use a constantly moving camera travelling through the level. The Player also travels through the level and has free movement within an area of the screen.
Constraining the player to an area of the screen
The player is free to move around an area of the screen. This area is unaffected by the camera as it is based on the screen location and not the camera location. When the camera moves, the active area appears to move with it.
Creating a Trigger/Active Area
In-game items can be constrained to an area of the level or screen using an Active Area. The Active area is created using a Trigger. A Trigger is an area of the level or screen that can trigger events or actions. We can also use it to mark out our active area.
Click the Trigger button ![]() from the Tools pane and place the Trigger somewhere in your level.
from the Tools pane and place the Trigger somewhere in your level.
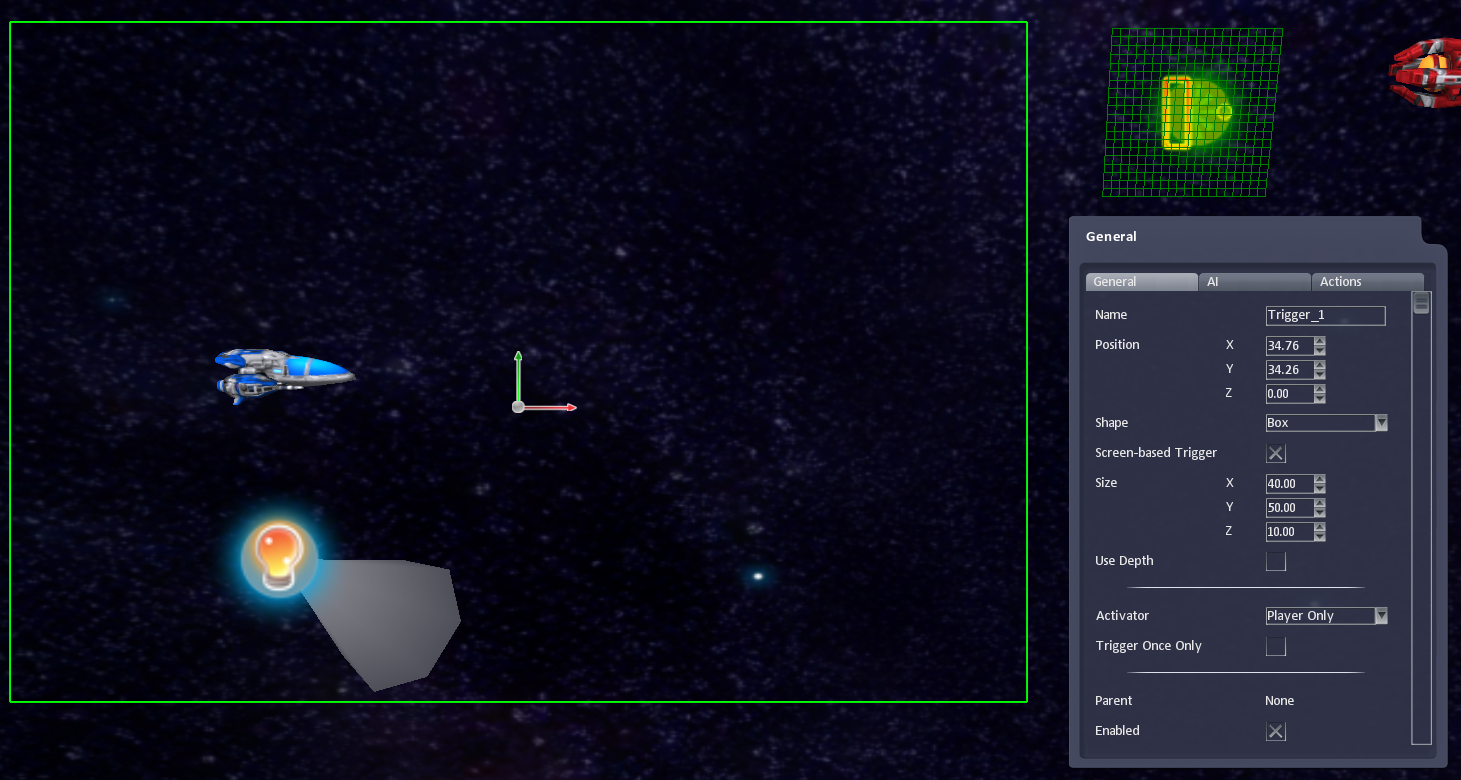
For a Gradius-style game we want to change the shape to be a box. This can be done by selecting Box from the Shape property dropdown list.
We also want the active area to be based on the screen location. Clicking the Screen-based Trigger property will change the trigger to use screen relative coordinates. Screen-based coordinates use percentages. If the X Position is 0 then the centre of the trigger will be on the left of the screen. A value of 100 will make the centre of the trigger be on the right of the screen.
The size of a screen-based trigger will also use percentages. A width of 100 will fill the width of the screen; and a height of 100 will be as high as the screen.

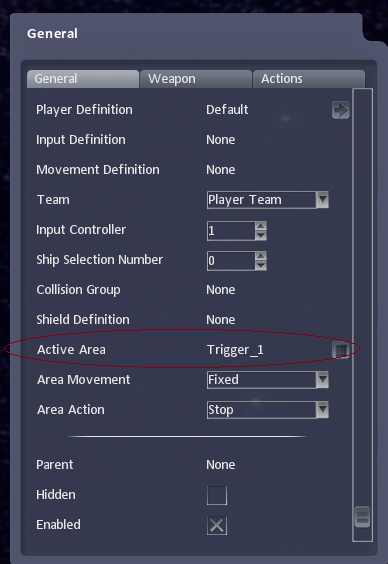
The player can be constrained to the Trigger/Active Area by selecting the player and clicking the Active Area property on the General pane. A window will appear that allows you to select the Trigger/Active Area you have created.

We want the player ship to stop if it reaches the limits of the active area. We can set this using the Area Action property. We could have the player wrap-around the area, or bounce off the edge, but Gradius style games simply make the player stop at the edges of the active area.
![]()
Creating the Camera
Create a new camera by clicking the Camera icon ![]() on the Tools pane and place it near the player’s starting location in the level.
on the Tools pane and place it near the player’s starting location in the level.
Tracking the Player
We can set the camera to follow the player or any other in-game item. For a Gradius-style game we needn’t do this as the player can move around the screen independently of the Camera. However, we could use the tracking feature to ensure the camera remains a fixed distance from the player.
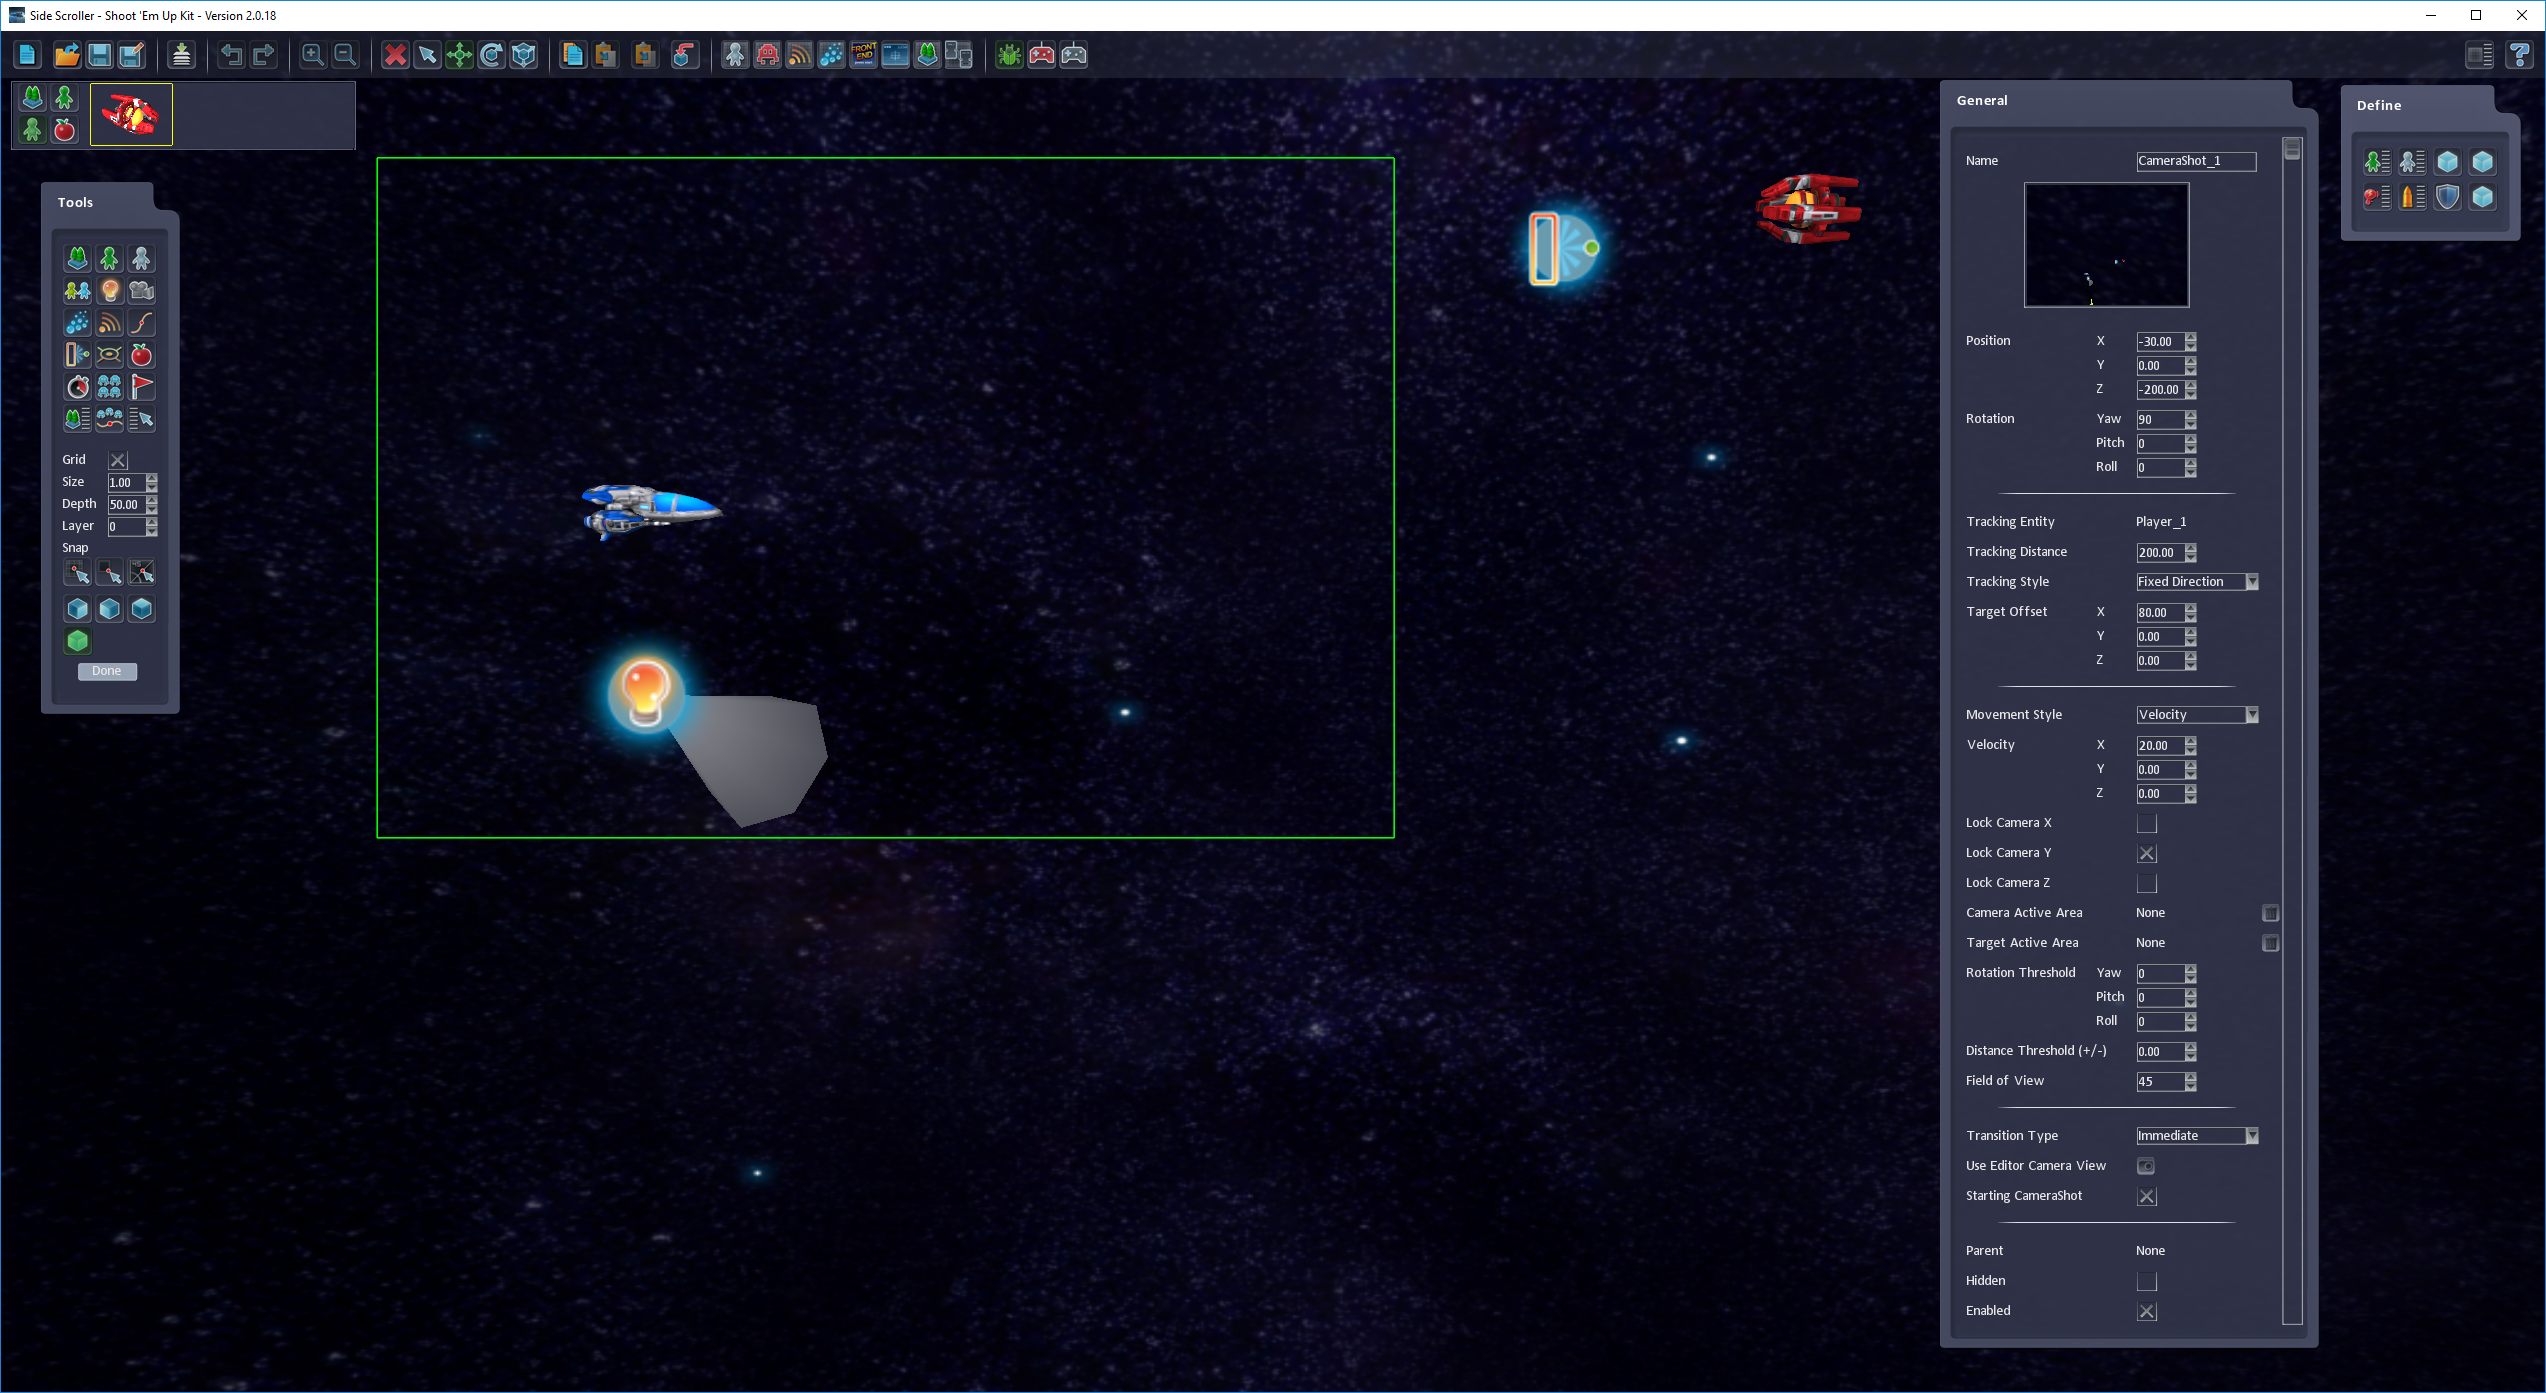
Clicking the Tracking Entity property will allow us to select which item the camera will follow.
We can set the Tracking Distance property to control how far way the camera will be from the Entity.

We can also set an offset distance. The camera will normally focus on the Entity to be tracked but we can add an offset distance to move the camera away from the Entity. This is useful for games where you don’t want the Player ship to be in the centre of the screen.
In Gradius style games the player ship is usually over to the left of the screen and so we can nudge the focus of the camera slightly to the right. However, we will be selecting some options which override the Target Offset and so these values are not required in this example. They will be used when the Tracking Style property is set to Follow.

Free Movement
Tracking the player is useful but for a Gradius style game we want the player to be able to move freely around the active area of the screen without the camera focusing on the player’s exact location.
We can tell the camera to remain in a fixed direction by modifying the Tracking Style property. The Fixed Direction option will keep the camera focused in its default direction, specified in the Rotation properties.
Moving Camera
Gradius style games are set in a constantly moving level. We can achieve this by setting the Camera to move at a constant velocity.
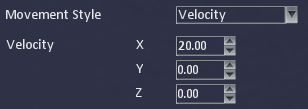
Set the Movement Style property to Velocity; and set the speed in which you’d like the camera to move using the Velocity X, Y and Z properties.

The camera will now move in the X direction while the player is free to move around in the active area which is contained within the screen.
